Meshy 7 Retexture: from a grey prop to a game-ready asset
Meshy 7 Retexture paints new materials onto a 3D model you already have. A four-pass workflow, prompts that name every part, and when to switch on 8K and PBR.
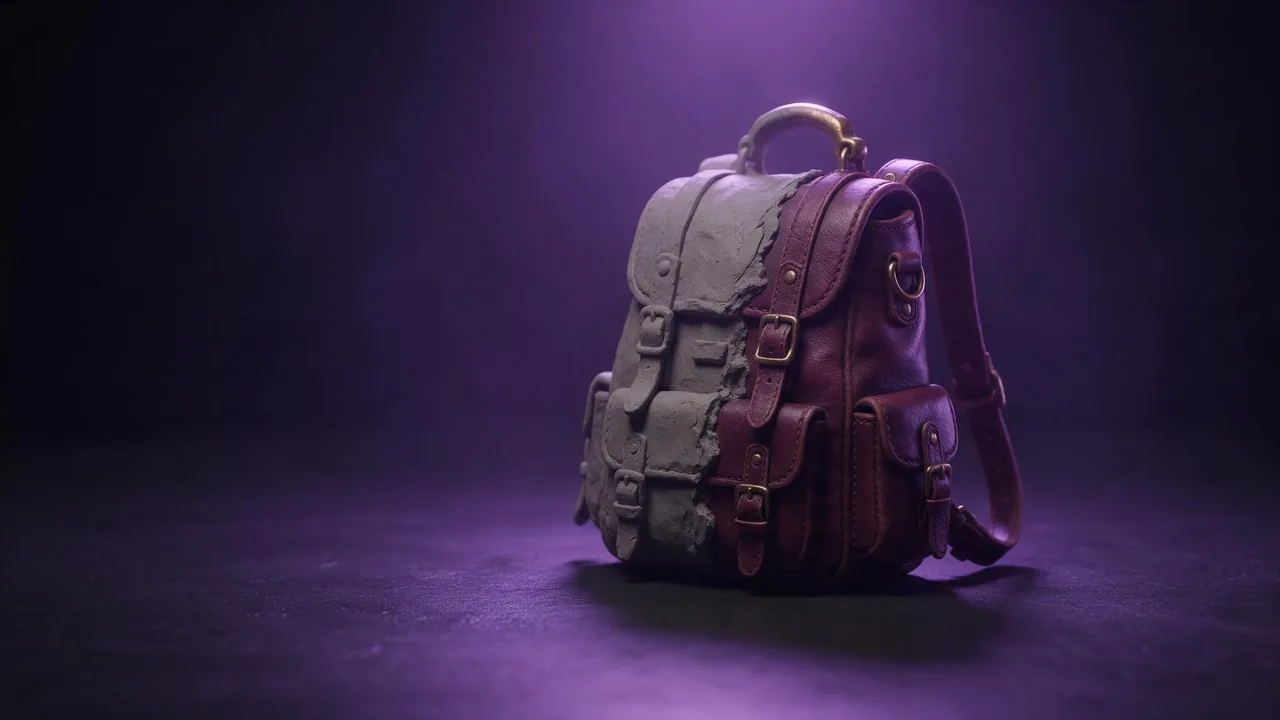
Every game artist knows the moment: the shape is done, it reads well from every angle, and it is still a grey lump. Meshy 7 Retexture is built for exactly that moment. You give it a 3D model and a description of the materials, and it paints a new surface onto your geometry without touching the shape. Its own example on the model page is a good picture of the job: a fantasy backpack that comes back in aged burgundy leather, dark straps, antique brass buckles and three potion bottles in emerald, amber and violet glass.
Below is the way of working that gets a usable asset in the fewest runs. It is four passes, and only the last one is expensive.
Pass 1: get the file ready
The model accepts GLB, GLTF, OBJ, FBX and STL. Before you send anything, open the file in your 3D tool and check two things. First, holes, flipped normals and overlapping faces: the model paints what it is given, and broken geometry turns into smeared texture. Second, the UVs. Keep original UVs is on by default, which is what you want for a model that already has a clean UV layout, because the new texture lands where your engine expects it. If the file has no usable UVs, an STL from a scan for example, switch it off, as the setting's own description advises.
Pass 2: describe the materials part by part
The prompt holds up to 600 characters, and the best use of them is a list of parts, each with its own material. The model cannot guess that the round thing on the strap is a buckle; you can tell it. The backpack example works because it names every region: leather body, straps, buckles, blanket, three bottles, each with its own colour and finish, then one line about wear and one about the overall style.
Retexture this sword: blade in dark folded steel with a faint wavy pattern and a bright polished edge, cross guard in blackened iron, grip wrapped in worn red leather, pommel in tarnished brass. Light scratches along the blade, darker grime in the grooves. Grounded medieval look, no glowing effects, no runes or lettering.Retexture this sci-fi crate as a used cargo container: chipped olive-green painted metal panels, black rubber corner bumpers, yellow and black hazard stripes on the lid edge only, dusty grey grime in the recesses. Industrial, believable, slightly worn. No text, numbers or logos.If you have a picture of the exact look, a leather sample or a photo of a mossy wall, you can pass it as a texture image instead (it goes in as a link). The model page says the picture takes priority over the prompt, so pick one; sending both does not blend them.
Pass 3: choose the look cheaply
Leave the two expensive switches alone while you are still deciding. Texture resolution defaults to 2K and PBR maps default to off, and that is exactly the right setup for comparing a rusty version with a clean one, or bronze with stone. Run two or three prompts at those defaults, look at them in your viewer, and keep the one you would ship.
Pass 4: the final, at full quality
Now run the winning prompt once more with the settings your engine needs. Texture resolution goes up to 4K or 8K for the base colour. PBR maps add metallic, roughness and normal maps, which is what makes leather look soft and brass look like metal under real lighting. One detail from the setting's own description: at 8K the base colour is 8K but the PBR maps stay at 4K. For most game props 4K is plenty; keep 8K for hero assets the camera gets close to.
Who should pick it
Pick Meshy 7 Retexture when you own the shape and want control over the resolution. If you only need quick base-colour variants and no resolution choice, the Lite version covered in the Meshy 6 Lite Retexture guide has the same inputs minus that setting. If you do not have a model yet, start with an image to 3D model on the models page and bring the result here.
The limitation to know before you start
It paints, it does not sculpt: a missing handle stays missing and a lumpy scan stays lumpy. And in our studio the model's upload slot takes pictures, not 3D files, so today you cannot drop a GLB into it from the browser. Run it through the API and pass a public https link to your model file; the API docs show the request. For planning several looks of one object, the product photography guide and the post on texture and material words are both worth a read.
Questions
Does Meshy 7 Retexture change the shape of my model?
No. It keeps the geometry and replaces only the surface: the base colour, plus metallic, roughness and normal maps when PBR is on.
Which texture resolution should I use?
Stay on the 2K default while choosing a look. Use 4K for the final game asset and 8K for close-up hero props; at 8K the PBR maps stay 4K.
Can I upload a GLB in the studio?
Not yet: the studio's slot for this model takes pictures. Use the API and pass a public https link to your model file.